
I thought I would spend a little time taking about herbs.
Every year I plant herbs but somehow I never seem to utilize them to their fullest..mostly because I really didn't know how to.
This year I decided it was time to learn a bit more about growing, harvesting and storing herbs. If I'm going to grow them I should be using them right?
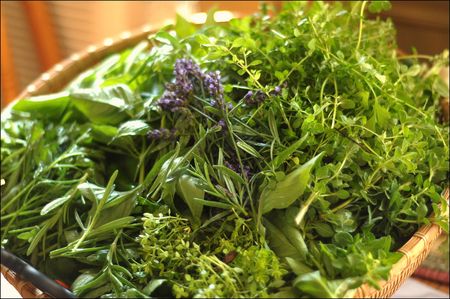
One thing I have learned is herbs should be harvested early in the morning. As the day heats up the herbs release their oils which creates a bit of bitterness if they are harvested later in the day….so early yesterday morning I headed out to the garden with my big basket and kitchen shears.
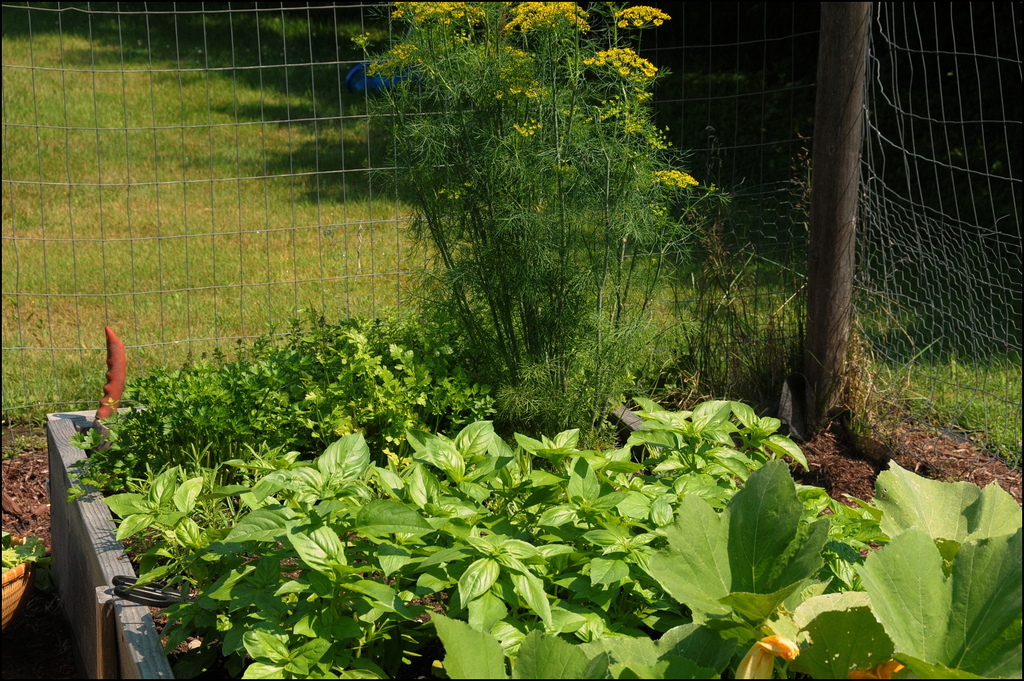
This year in the herb bed I have the following herbs….
Lemon Thyme, Pizza Thyme, Tarragon, Sage, Flat leaf Parsley, Cilantro, Dill , Oregano, Lavender and LOTS of Basil…we love basil here. 🙂
Again because we had allocated a good sum of money for compost and tomato stands I had Ken rig up an herb drying contraption for me instead of buying something.
What we did was to take an old wooden window screen that had been in the barn and to that Ken cut out a piece of nylon mesh screen that we have for screen repair to the size of the window screen. We then stapled that piece to the top of the screen on the same side and added a strip of velcro to the bottom and the sides. This way the herbs can be stored either horizontally or vertically out of the sun and still get good airflow for drying. The cost was next to nothing…yay!

There are 3 different methods that I use for storing herbs. I will start off with the herb we use the most…..basil.
Basil is a tender herb and bruises easily, so when I harvest it I try to utilize it quickly. If you can not get to it right away you can put it in a vase or bucket of water like you would a bunch of flowers to keep it from turning black.
So…what I do is pull all of the leaves off of the stem….fill up my little mini food processor and add a tablespoon of Olive Oil to keep the basil green…..hit the button…chop, chop, chop….add a little more basil…chop, chop, chop chop…and then….
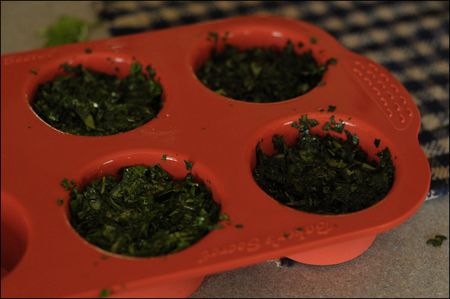
I press the mixture into these little silicon muffin bakers that I have. These go into the freezer for a few hours..then I remove and put the little muffins into a freezer bag. Each little muffin is the amount that I use for a double batch of pesto which we eat a lot of. I also toss this mixture into my spaghetti sauce or soups…yum!
Some herbs in the garden are very prolific, such as Oregano, Thyme and Rosemary. Cutting herbs back hard every 7-10 days encourages growth and holds them back from flowering, but there is no way that we can use that many herbs in that short of a time frame, so these herbs I dry when I cut them back.
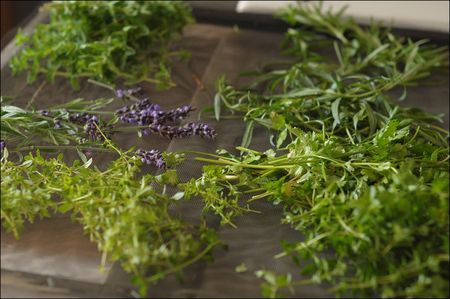
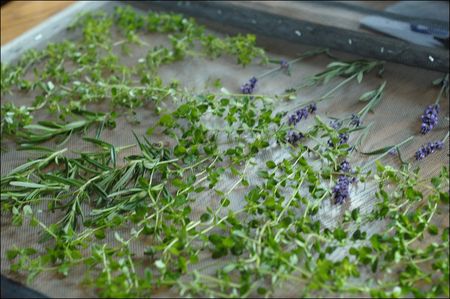
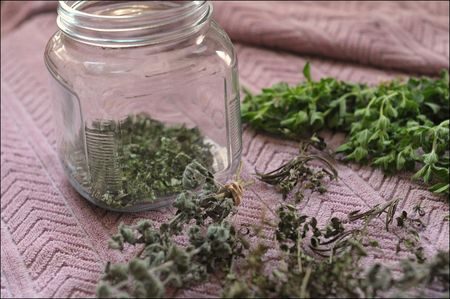
There are different methods of drying, such as the drying rack that I use for the less prolific growers. The other method I use is drying upside down in bunches. In the picture above you can see the fresh oregano that I picked on Saturday. I stripped the leaves about an inch down from the end of the stem. Then I gathered about 5 or 6 stems and wrapped an elastic around the end. These bunches live in my office where I have a shaker peg rack. It takes about 2 weeks for them to completely dry. Once dried I slide my hand down the stem and the dried leaves go into the jar….easy peasy. 🙂
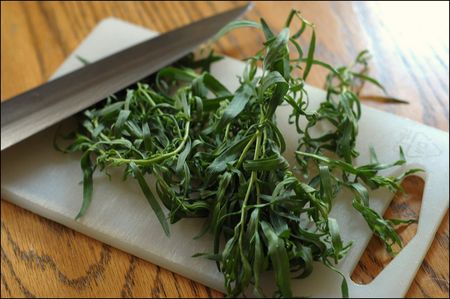
With tarragon I do something a bit differently. Tarragon is another herb like basil that holds a lot of water and has a tendency to turn black, so with Tarragon I strip the leaves off of the stem and chop it finely with a knife.
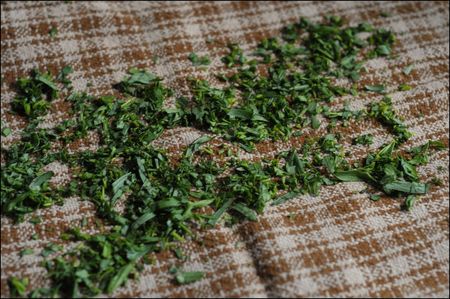
I then set the chopped tarragon on a dry cotton towel to dry. It only takes a few days for tarragon to dry this way and the nice thing is…it dries green :-). Tarragon is my favorite herb from the garden and I love the way it's aroma fills my kitchen as it is drying….mmmm….!!

Lastly and the easiest is storing herbs you know you will use within a week. Just wet a paper towel and wrap a little bundle in it. Above you see a bundle of cilantro and a bundle of parsley. I pop these little bundles into a plastic bag and use them as needed during the week….again, easy peasy!
Drying herbs does take a little time. I spent my Saturday morning doing all of this, but I will be happy that I did so when I use these dried herbs in my cooking over the winter. I know that no pesticides were used and I saved a boatload of money …dried herbs are getting expensive in the supermarket!
I hope that these little tips will encourage you to plant an herb garden. There is nothing quite like wonderfully fresh herbs….and the dried ones that you raised yourself will make you smile in the winter….. 🙂
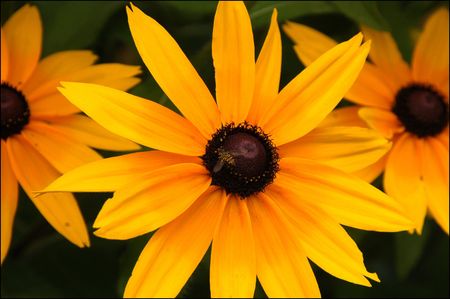
And now a treat from the perennial garden…one of my most favorites…Rudbeckia. If you click on the picture you will see the tiny happy bee fly…..buzzzzz…………Thanks Paula for letting me know that it isn't a real bee…who knew!
Until next week…happy gardening and stay green. 🙂

Have you ever tried drying herbs in a microwave? I think I’ve heard of that before, but don’t know if it changes the flavor or not.
Some of my friends also dry theirs in a dehydrator because it’s quicker than the process of tying them up and hanging them. You can just fill the trays with them and dry.
LikeLike
Yay for herbs! I, too, don’t use them to their fullest potential. I should try harder.
LikeLike
Thank you for the great ideas for herbs. We didn’t plant as many this year as we don’t use them to their fullest, either. You’ve given me some great ideas. One of our favorite herbs this year has been a lime basil. It might also be called Thai basil. It’s very mild yet flavorful.
LikeLike
Great tips for keeping the herbs we grow! I especially like your frozen basil method.
Your rudbeckia are ahead of mine a bit. I think that little insect is a bee fly.
LikeLike
Very helpful hints! Mine are decorative on the deck, and I want more than just salad addition use out of them.
LikeLike
This is a really helpful post. I tend to neglect my herbs but I learned a lot here and I think it will help me spend more time on my herb garden.
LikeLike
Thanks so much for this post. I follow your blog for the pretties that you knit, but this post was GREAT, because just this year I have started a few herbs, not really knowing what to do with them. I will be sure to check back with this post each time I harvest a little bit of the herbs.
LikeLike
I love the fragrance of an herb garden. Totally worth growing, if only for that one reason.
LikeLike
Thanks for the herb post. I have herbs, but I don’t use them to much since I don’t know how to store them. Great Ideas!!
LikeLike
For the basil, I do sort of the same thing. I don’t normally have a giant harvest, so I just make up pesto and freeze it in small ice cube trays. Then I can just grab one or more pesto cubes when I want them. This year I planted a lot more, so maybe I’ll try your method.
Otherwise, I just use the hang-in-bunches method.
Thanks for the tip on the tarragon – I’ve never tried drying it, but I’ll definitely give that a shot. Maybe today.
LikeLike
Very helpful!! I planted quite a few more herbs than usual this year… and I, too, need to try harder…
LikeLike
next time you clip your tarragon, mix a significant amount with a sitck of soft butter. store it in an air tight jar in the fridge. It’s a great for grilling fish, a dollop on a grilled steak is amazing, anywhere you need butter and like taragon… you are good to go… my favorite, on fresh, homemade bread right out of the oven!
LikeLike
Thanks for the information. I’ve never had a garden, but this inspires me to try.
LikeLike
oh, what a wonderful and beautiful post about herbs; i’m a little ashamed that i’m not nearly as considerate of mine. but you encourage me to take more care with them . . .thanks!
LikeLike
I need to know more about how to harvest the herbs (where and when in the growth cycle etc.) to harvest. Do you recommend any particular resources for that information?
I keep the cilantro and parsley in glasses of water in the fridge. I like making chimichurri sauce and am contemplating freezing it like you do the basil.
LikeLike
Great post! I have several herbs potted that I use as I need them, so I don’t get full use out of them. Your methods are great for extending their use. I’m bookmarking this post. 🙂
LikeLike
Oh and I made pest today. 🙂
LikeLike
Love the flower photo! Thank you for posting. It made me so happy that it’s now my desktop background. 🙂
LikeLike
This is such a great post. So many ideas! I don’t grow many herbs – just basil, rosemary, sage and lavender. We use the rosemary all the time and it grows more or less year round. The basil gets planted each summer and we enjoy it when it’s here (I’ll have to try your prep method and waste less). I’m almost embarrassed to admit that the only thing I do with the lavender is watch the bees buzz around it and I do nothing at all with the sage.
LikeLike
Like Cheryl S, I freeze pesto in icecube trays – very convenient for adding to pasta or soup, come winter.
I dry my other herbs – parsley, thyme, sage, oregano – but I’ve never done anything with my tarragon. Will try to remedy that this year!
LikeLike
Hello,
Just discovered your blog and thought I’d share how I dry herbs.
I put them on a cloth covered tray and put the tray in the car. As the car sits in the sun and heats up the herbs dry very quickly.
Marilyn
LikeLike
It’s fun to grow your spices in the garden. I learned a lot of the recipes you attached and the ways you taught to move the plants from the garden to the kitchen
LikeLike