Come on ladies….fire up those sewing machines for a quick and easy Christmas present. Perfect for teachers or MIL's who already have everything under the sun.
A few weeks ago Terry and I attended a machine quilting class. I won't say that either of us were bowed over by the class…that's a story for another time, but I did hang on to the fabric that I purchased to practice on at home.
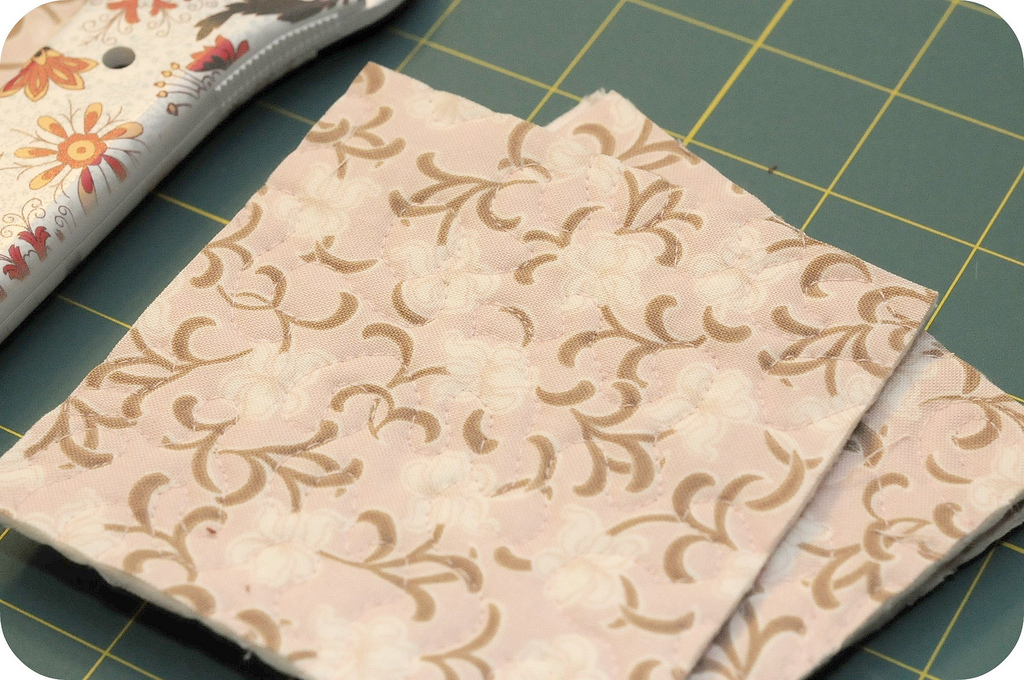
You can't see my stippling very well on the fabric as I used a thread that was very close in color, but over all I was really pleased with the results…..but what the heck do you do with a 1/2 yard piece of fabric in a color that is definitely not one of your favorites? Hmmmm…………
A few weeks ago I was reading one of my favorite quilting blogs and stumbled upon this tutorial. (thanks Christina!)
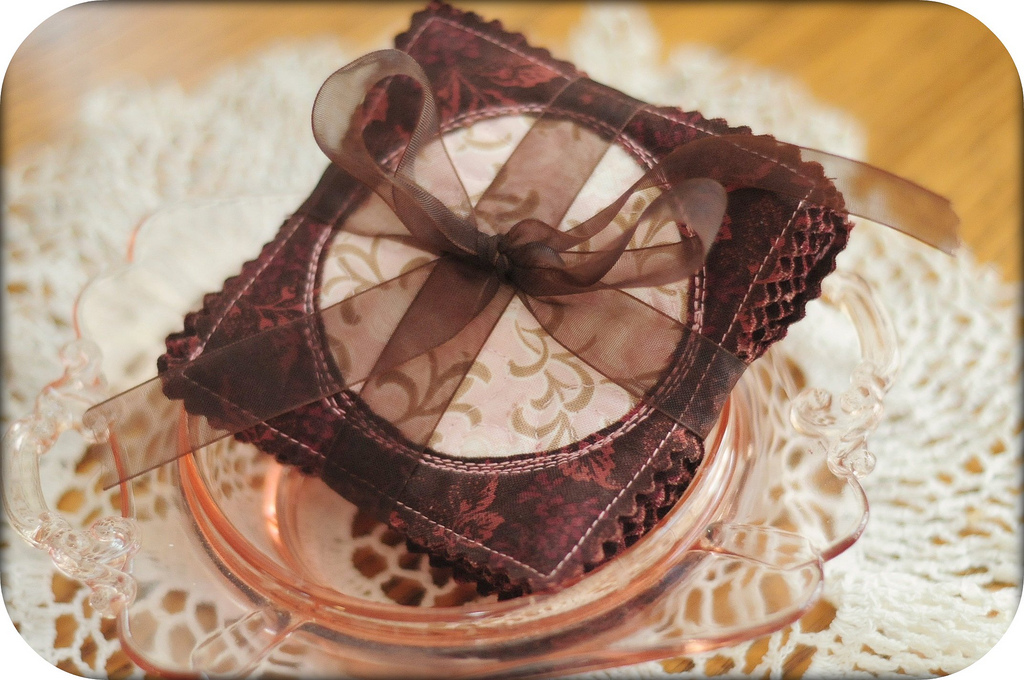
Wow……..how perfect and timely for my stippled fabric that I just couldn't bear to throw away! Now mind you, I prefer Christina's bright cheery colors against the linen, but I also knew that the pink and brown matched the living room of the potential recipient, so yay it would work!!
Basically what I did was cut 3.25 inch squares from my quilted fabric, followed by 2 4 inch squares from my other fabric.
(I differed a bit here from Christina's directions)
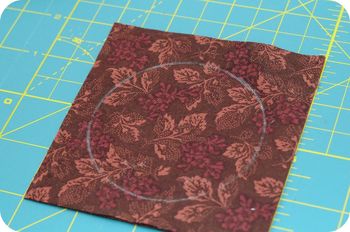
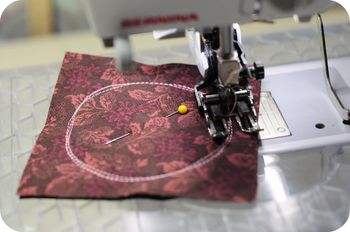
Using a glass for my circle template, I traced it onto the top of the brown fabric and then randomly stitched 3 times around….easy peasy.
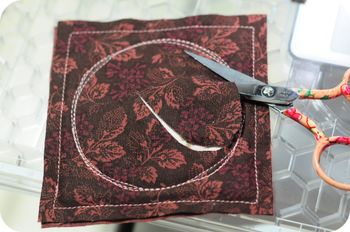
Next a little reverse applique. Just cut the fabric inside of the circle that you stitched and then stitch 1/4 inch around the outside of the fabric.
 Extra special treat… I got to play with a toy I bought earlier this summer. Ken will tell you that I am a sucker for gadgets and I will tell you straight up I swooned when I saw this antique singer pinking machine on a quilting blog.
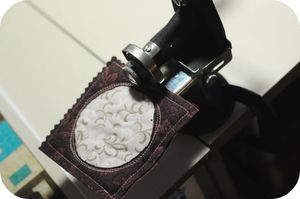 A quick search on ebay and one was mine for a ridiculously inexpensive..ok…cheap amount of money. (MUCH less than the link…so hang in there for a cheaper one…they are out there)
Works a charm on pinking edges….sooooooo much easier than my clunky pinking shears!
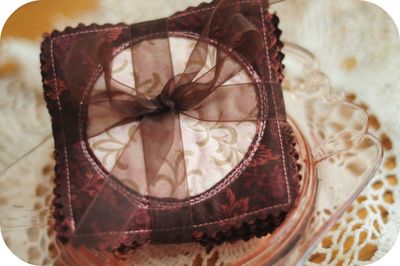
And there you have it………so fast and easy and SO much fun!! Remember that beautiful Rouenneries fabric that I shared with you? I'm seeing some red and tan coasters happening here very soon.
Have fun coasting!!!

Too cute! such a nice gift.
LikeLike
That is a quick and pretty gift! Good tutorial, too. I’ve never heard of a pinking machine. What a great idea! Pinking shear are a nemesis.
LikeLike
Great coasters! I hadn’t heard of pinking machines either.
LikeLike
Love the coasters…..but wowza! Never heard of a pinking maching and MUST. GET. ONE!
LikeLike
The pinking machine is so neat! It put the perfect edge on the coasters.
LikeLike
Very cool. I want to do stippling on the table topper I posted yesterday. I need to sit and practice. Any huge tips? I’d love to buy a Bernina with that stitch regulator thing!
LikeLike
Those are adorable!
LikeLike
What a wonderful idea! I can see using this technique for little embroidered designs I don’t know what to do with as well. Thanks for the inspiration Kim!
LikeLike
So much sewing eye candy! I love that little pinking machine! I have my grandmothers Italian pinking shears. I treasure them.
LikeLike
Pinking machine? Wow. Those are awesome! Pity I don’t sew or own a sewing machine.
LikeLike
A pinking machine? Wow. Those are awesome coasters! Pity I don’t sew or own a sewing machine.
LikeLike
oh i LOVE that pinking machine; i wouldn’t use it at all but i’ll live vicariously through you and yours, hee-hee!
LikeLike